

To add certifications on LinkedIn, open your own profile, click Add profile section, expand Recommended, and choose Licenses & certifications, then fill in the certificate name, the issuing organization, the dates, and the credential ID and URL before you save. The same section lives in the LinkedIn app behind your profile photo and the Add section button. Each certificate takes about 2 minutes, and once it is saved a Show credential button can link straight to your badge so anyone can check it is real.
That little section does more work than it looks like it should. A recruiter scanning your profile reads a recognized credential as proof you actually did the training rather than just listing a skill, and a filled-in Licenses & certifications block is one of the details that separates a complete profile from a half-finished one. It is quick to add and easy to get slightly wrong, which is why so many profiles show a certificate with a blank issuing organization or no verification link.
This guide walks through the exact click path on desktop and in the mobile app, what every field means and where to find your credential ID and URL, how to add a certificate quietly so it does not blast your whole network, which certifications are worth adding and which just clutter the page, and what to do when a certification you saved refuses to show up. Every step and setting here was checked against how LinkedIn works right now rather than pulled from memory.
One thing to keep in mind before you start: a certification sitting on your profile is a static badge, and it earns far more attention when you also talk about it. That second half, turning a credential into a post people actually see, is where LinkedGrow fits, once the certification itself is added and verified.
Where do certifications go on your LinkedIn profile?
Certifications live in a dedicated Licenses & certifications section on your LinkedIn profile, which sits in the main column below About and Experience. If you have never added one, the section is not there yet, and you create it through Add profile section rather than by scrolling to find it. Once it holds at least one entry, LinkedIn shows each certificate with its name, the issuing organization and its logo, the date, and a button to verify it.
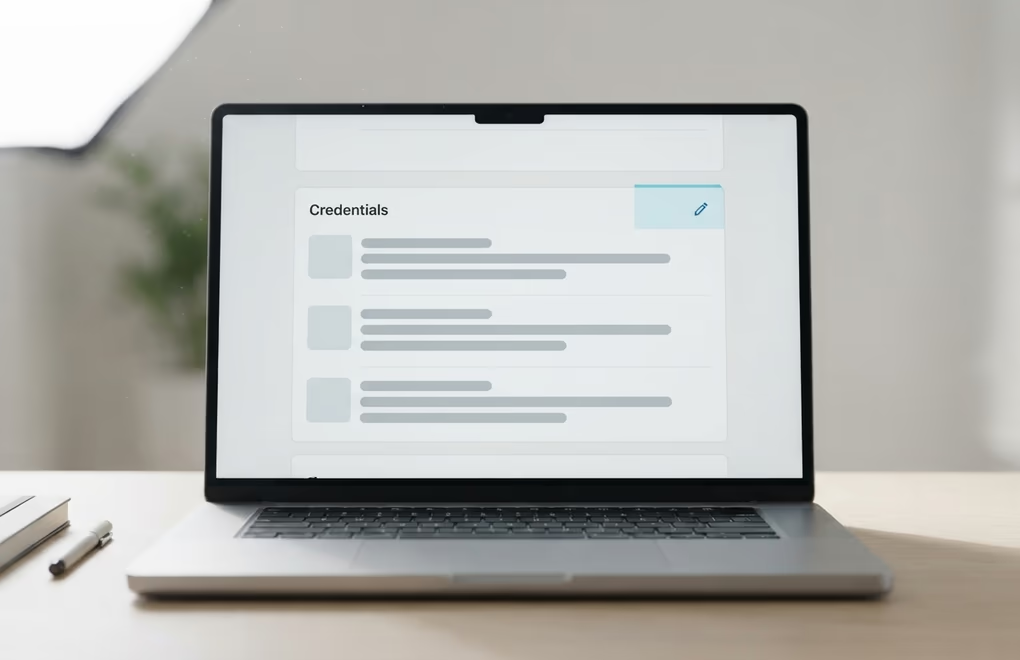
It is worth knowing how this section differs from Skills, because people mix them up. Skills are single keywords you list and get endorsed for, while a certification is a named credential from a specific issuer with a date and, ideally, a link that proves it. Recruiters can search and filter on both, so a certification backs up a skill with evidence rather than repeating it. If the rest of your page still needs work, our guide to LinkedIn profile optimization covers the headline, About section, and the order your sections should appear in. While you are polishing the profile, 2 small changes make the credentials you just added carry more weight: setting a custom LinkedIn URL so the link you share looks deliberate, and earning the verified badge so a recruiter trusts that the profile behind the certificates is really you.
How do you add certifications on LinkedIn on desktop?
On desktop you add a certification from the Add profile section button that sits just under your name and headline, then pick Licenses & certifications from the Recommended list. The form that opens has 6 fields, and filling all of them is what turns a bare line of text into a credential a recruiter can actually verify. The whole thing takes a couple of minutes once you have the details in front of you.

- Click the Me icon at the top of LinkedIn, then click View Profile.
- Under your name and headline, click Add profile section.
- Expand Recommended, then click Add licenses & certifications.
- Fill in the fields, starting with the certificate name and the issuing organization, which you pick from LinkedIn's list so the logo attaches.
- Add the issue date, the expiration date or the "does not expire" option, and your credential ID and URL.
- Click Save, and the certification appears on your profile straight away.
A couple of those fields trip people up, so here is what they mean. The credential ID is the reference number the issuer gave your certificate, and it usually prints on the certificate itself or lands in the email they sent when you passed. The credential URL is the public link to your certificate or digital badge, and when you paste it in, LinkedIn adds a Show credential button that opens the proof in one click. Skip that link and the credential still shows, but nobody can confirm it without asking you.
Courses you finish on LinkedIn Learning are a small exception, because they are not pushed to your profile automatically. To add one, open My Library, click Learning History, find the course, click the More icon next to it, and choose Add to profile. The certificate and its related skills come across in one step, which is quicker than typing the whole entry by hand.
A couple of extras are worth the extra 30 seconds. You can attach media to a certification, so link or upload the certificate as a document or image and a visitor opens the actual proof rather than trusting a line of text. The form also lets you associate skills with the credential, and adding the 2 or 3 skills the training really taught ties the certificate to the exact keywords recruiters search, which is a small move most profiles never bother with. One cap is worth remembering: a LinkedIn profile holds up to 100 skills, so if you are already at that limit the skills from a new certificate will not attach until you remove a few.
How do you add a certification in the LinkedIn app?
You can add a certification straight from the LinkedIn app, and the path mirrors the desktop one closely once you open your own profile. The fields are identical, so the only real difference is that you are tapping through the Add section menu on a smaller screen. It is handy when the confirmation email with your credential ID is already sitting in your phone.

- Tap your profile photo in the top left, then tap it again to open your full profile.
- Tap the Add section button that sits just below your headline.
- Open the Recommended group, then tap Add licenses & certifications.
- Fill in the same 6 fields, then attach media if you want to show the certificate itself.
- Tap Save to publish it to your profile.
LinkedIn reshuffles the app layout every so often, so if a label sits in a slightly different spot, update to the latest version and the menu usually falls back into place. When the app is being stubborn, a desktop browser is the more reliable route, since the profile editor there changes less often and gives you the whole form on one screen.
How do you add a certificate without posting it to your feed?
To add a certificate quietly, uncheck the Share with network option in the save dialog before you select Save, which stops LinkedIn from pushing the update into your connections' feeds. If you would rather silence every profile change at once, switch off Share profile updates with your network in Settings and Privacy under Visibility. Either way the certification still appears on your profile the moment you save it.

This matters more than it sounds. If you are adding 5 certificates in one sitting, sharing each of them turns your update into feed spam that your network scrolls past and quietly resents. Adding them silently and then posting once, on purpose, about the credential that actually means something is the cleaner play. The global toggle is the safer choice when you are doing a big profile cleanup, because it covers job changes, headline edits, and everything else in the same pass. You can read the exact behavior on LinkedIn's help page on sharing profile updates, straight from the source.
Keep in mind that anyone who lands on your profile sees the new certification whether or not you shared it, so quiet means no notification, not hidden. That is usually exactly what you want, since a certificate is worth having on the page long before it is worth a dedicated announcement. It also matters if you are currently employed and topping up your profile without signaling anything to your team, where a silent update lets you stay current while you decide what to make public later.
Which certifications should you actually add?
Add the certifications that support the work you want next, not every badge you have ever collected. A short list of recognized, relevant credentials reads as focused and current, while a wall of minor certificates buries the 2 or 3 that a hiring manager actually cares about. Treat the section as a curated shortlist rather than a complete archive of your learning history.
A few filters help you decide. Keep anything a recruiter in your field would recognize by name, like a cloud, project management, or analytics credential, and keep the recent ones that show you are still learning. Drop the certificates that no longer match your direction, the 2-hour completion badges that carry no weight, and anything so old it dates you rather than helps. When a credential is genuinely prestigious and short, like an abbreviation people put after their name, you can also add it to your name field so it shows in every search result, which pairs well with a strong headline. Our LinkedIn headline examples show how they work together.
A quick way to audit the list is to picture the role you want next and read each certificate through that lens. A marketer moving toward analytics keeps the data and analytics credentials front and center and quietly drops the unrelated ones from years ago. The goal is a section someone can scan in a few seconds and come away knowing what you are good at, rather than a long list that makes them dig for the point.
There is a real case for leaving some off. If you are mid-career and your experience already carries the story, a pile of entry-level certificates can make you look like you are still proving the basics. The certifications you keep should reinforce the level you operate at, which is the same instinct behind a well-built personal brand on LinkedIn, where every part of the profile points at the same person.
Why are your LinkedIn certifications not showing?
A certification you saved usually is on your profile, it is just sitting lower than you expected, because LinkedIn sorts the section by date rather than by the order you added things. Credentials marked as never expiring tend to land near the top, then the rest fall into place by their dates, so a fresh entry can appear below older ones. Before you assume it failed to save, click Show all certifications to see the full list rather than the trimmed preview.

When it genuinely is not there, a handful of causes cover almost every case. You may have saved it while editing a secondary profile language, so switch back to your primary language and check again. A browser or app that has not refreshed can lag behind, so reload the page or force-close the app. And if you added the credential to LinkedIn Learning but never pushed it through Add to profile, it stays in your Learning History and never reaches the public page. Working through those in order clears up nearly every disappearing certificate.
Since the order is set by dates and you cannot drag entries around, curation is how you control what shows first. Deleting an old or irrelevant certificate is the fastest way to lift your strongest one up the list, and setting an accurate issue date, or ticking the no-expiry box where it is true, keeps the most important credentials where people see them. You can manage and edit any entry through the pencil icon on the section, as covered on LinkedIn's help page for managing licenses and certifications.
Turn a new certification into content people actually see
Adding certifications on LinkedIn is the easy half, and you now have the whole path: open Add profile section, choose Licenses & certifications, fill every field including the credential ID and URL, and decide whether to share the update or keep it quiet. Curate the list to the credentials that match where you are headed, and check Show all when something seems missing rather than adding it twice. Handle that once and the profile side is done, which frees you to work on the content that actually pulls people to the page, the half LinkedGrow is built for.
The harder, more valuable half is getting the certificate seen. A badge on your profile waits for someone to visit, while a short post about what you learned and why it matters lands in front of your network on its own. That is where voice training earns its keep: LinkedGrow drafts a post in your own voice from a few of your past posts, runs on your own AI key for a typical $2 to $4 a month, and schedules it for when your network is online. If you are not sure what to say, our list of what to post on LinkedIn gives you a running start.
Add the certification today, then give people a reason to notice it. You can turn your next credential into a post with LinkedGrow on a 7-day Pro trial, so the work you did to earn the certificate does not just sit quietly on your page.
Frequently asked questions about adding certifications on LinkedIn
When you fill in the dates, tick the box that reads This credential does not expire, and LinkedIn hides the expiration field for that entry. Certificates with no expiry also tend to sit near the top of the section, so it is worth ticking the box for anything that genuinely never lapses, like a university course or a lifetime credential.
By default it can, since a new certification counts as a profile update that your connections may see in their feed. To stay quiet, uncheck Share with network in the save dialog, or turn off Share profile updates with your network in Settings and Privacy under Visibility before you make the change. People who visit your profile will still see the certification either way.
LinkedIn Learning does not add it for you. Open My Library, click Learning History, find the finished course, click the More icon next to it, and choose Add to profile. You can pick whether to share it with your network in the same window, and the related skills come across unless you deselect them.
No, LinkedIn does not give you a way to drag certifications into a custom order of your own choosing. The section sorts itself, with credentials marked as never expiring near the top and the rest arranged by date. The real lever you control is curation, so delete anything old or irrelevant to push your strongest credentials up the list.
No, treat the section as a shortlist rather than a full archive. A handful of recognized, relevant credentials reads as focused, while 20 minor badges bury the ones that matter and make the profile look padded. Keep the certifications that support the work you want next and leave the filler off.
The post you keep meaning to write takes four minutes here.
LinkedGrow turns a link, a video or a rough idea into a LinkedIn post written in your own voice, then puts it in the calendar for the morning your audience is awake.
Start free for 7 days